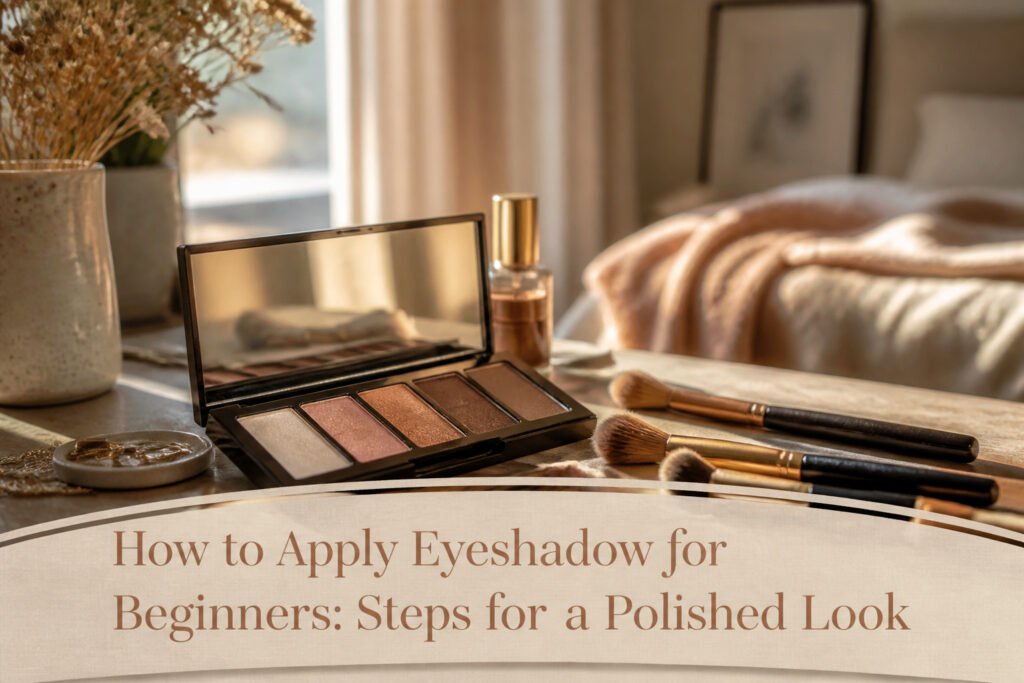
A polished eye look takes roughly ten minutes, one small palette, and five brushes. Most beginners get the crease wrong: they apply color with eyes closed, then open them to find the shadow has vanished into a hooded lid or deep socket. Keep your eyes open, place the medium shade slightly above the natural fold, and the dimension you wanted actually stays visible.
1. Prime Your Lids

Skipping primer is the mistake you will notice by noon, not the one you catch in the mirror at 8 a.m. Five separate guides flag it as the most common error beginners make, and the reason is simple: unprimed lids let shadow crease and fade within hours. A small amount is enough. Dab on a thin layer of eyeshadow primer or concealer and blend it from the lid up to the brow bone. You are building a surface the pigment can grip, not masking the skin. Rush this step and the rest of the look falls apart before lunch, no matter how carefully you chose the colors.
2. Apply a Base Color

Pick up a fluffy blending brush and sweep a neutral shade across your entire eyelid, from the lash line up to the crease. This is your base, and it sets the stage for every layer that follows. Most beginner-friendly palettes are built around neutrals for exactly this reason: they forgive uneven application and they pair with almost anything you add later.
The common mistake at this stage is loading on too much product. You will see the color fade as you blend, which tempts you to pack more on. Start with less than you think you need. You can always build, but brushing excess off a crowded lid disturbs the finish and costs you time you do not need to spend. Tap your brush against the palette edge to shed the loose powder, then work in light, windshield-wiper strokes. The goal is an even wash, not a wall of color.
If your palette follows the standard quad format, reach for the second-lightest shade. A flat brush works for depositing color, though a fluffy brush gives you the blending motion that keeps edges soft from the start.
3. Define Your Crease

The crease is the natural fold where your eyelid meets your brow bone, the soft socket that gives your eye its depth and shape. Apply a medium shade there to add dimension without drawing a hard line. You want a wash of color that sits back from the lid, creating a shadow effect that makes the eye look wider and more open.
You have two brush options for this, and the difference matters in practice. A fluffy brush deposits a softer, more diffused layer, which is what most beginners reach for first. The angled brush gives you more control along that crease line, and it becomes useful if you later want to define the outer corner with a darker shade, working it in a V from lash line to outer crease.
If your eyelids are hooded or deep-set, keep your eyes open while you apply. The color needs to sit where it will actually be visible, which on hooded lids means slightly above the natural fold on the lower brow bone, not down in the socket where it disappears. Start with less pigment than you think you need. It is always easier to build the color up than to soften it back down once it is on.
4. Add Darker Shades

Dip your pencil brush into the darkest shade and run it along the lower lash line, connecting it to the shadow at the outer corner so the two meet in a soft horizontal V. The common mistake is loading too much product onto that lower line; the brush picks up more than you think, and a thick stripe under the eye ages the whole look. Tap off the excess before you touch skin, then build in thin passes if you want more intensity.
The same deeper shade goes on the outer corner of the upper lid, pulled inward just far enough to create depth without closing off the eye. Some tutorials darken both the inner and outer corners in a bracket shape, but for a beginner the outer corner alone is the safer bet; it is easier to blend and harder to get wrong. Leave the center of the lid untouched so the lighter base still catches light.
5. Blend

The mistake that turns a careful eye look into something amateur is almost always the same: you stop too soon. You pack the color on, you see the shape, and you figure the job is done. It isn’t. Unblended edges are what reads as sloppy from across a room, not the color choices or the shimmer.
Grab a clean, fluffy brush that has no product on it. The point is to move shadow that is already there, not to add more. Work only where two colors meet, the border between your lid shade and your crease, or where your darker outer-V shade stops. Use the lightest pressure you can manage, sweeping back and forth in small arcs or tiny circles. Press too hard and you wipe the shadow off instead of softening it.
If you have gone too far and lost the depth you wanted, go back in with the brush you used for that color and press a little more on. Then blend again. For edges that still refuse to soften, load your clean brush with translucent powder or a matte shadow that matches your skin tone, wiped clean first, and buff that along the brow bone. It acts like an eraser for the hard line.
6. Highlight

A light matte shadow on the brow bone and inner corner is what separates finished makeup from something that reads flat in daylight. Place it just beneath the arch of your eyebrow and right where your eye meets the bridge of your nose. These two spots catch natural light, so brightening them creates the illusion of a more open, lifted eye.
This is the step that gets dropped when you are running late or low on sleep. It feels optional because it adds no color drama, only shape. Skip it and the darker shades in your crease and outer corner can pull the whole look downward, making you look more tired than you started. A small brush and a shade close to your skin tone take ten seconds. For more drama, a subtle shimmer works here too, though matte reads fresher for daytime. Think of it as the step that fakes a full night’s rest.
7. Apply Eyeliner and Mascara

Eyeliner defines the eye, but the line between definition and too much is thinner than you think. Start with a gel pencil in black right along the upper lash line and smudge it slightly so it melts into the shadow rather than sitting on top. The same brush you used for crease work, that angled brush from the tools list, can pick up dark shadow and press it over the pencil to set the line and soften the edge. Skip the lower lash line entirely if your eyes are small or easily overwhelmed, or run the pencil just along the waterline there and smudge once.
Mascara is where most beginners keep going past the finish. Two to three coats is the ceiling. Place the wand at the base of your upper lashes and pull upward, teasing slightly at the root for fullness without clumps. One light coat on the lower lashes opens the eye; more than that and you will see smudges before noon. Stop when the lashes look darker and slightly longer, not when they look like a different set entirely. The look is complete when the eyes read as defined from a few feet away, not when every step announces itself up close.
8. Set Your Makeup

Hold the spray about eight inches from your face and mist in a circular motion for full coverage. That distance matters; too close and you get wet spots that streak, too far and nothing lands where you need it.
Think of primer and setting spray as bookends. Primer preps the surface so shadow has something to grip; setting spray preserves the work so it does not migrate or fade. Skip either one and by 3 p.m. your lids either hold the shape you built or the color has collected in the crease and fallen apart.
Some mists work double duty. The Morphe Continuous Prep & Set Mist+, for example, can sit on skin before shadow goes down and again after the last layer is blended. That two-pass approach is useful if your lids run oily or your day runs long.
The Brushes You Actually Need

A small kit outperforms a drawer full of mismatched tools. These five brushes handle every step a beginner faces, and using each for its intended job keeps the result clean.
- Fluffy domed brush covers the entire lid fast and softens the border between colors so no harsh line sits at the crease
- Flat shader brush lays shadow onto the lid surface with direct, even pressure
- Angled brush reaches the outer corner, the inner corner, and the lower lash line where a domed head cannot fit
- Small tapered blending brush works color into the crease itself, adding definition without spreading pigment too high
- Pencil brush places shadow in tight, specific spots where control matters most
Eye primer deserves its own mention: it goes on before any shadow, and some tutorials suggest blending it with a dedicated eye primer brush rather than a finger if you want an even, thin layer across the lid. Setting spray finishes the look, locking everything in place so the work does not migrate or fade.
The wrong brush for the step you are on is a common beginner error. A flat shader pushed into crease work deposits too much pigment in one spot; a fluffy blender laid flat on the lid wastes product and sheers out the color you wanted to keep. Match the brush head to the shape of the eye area you are coloring and the job goes faster, with less fixing afterward.
Powder, Cream, or Stick

Powder eyeshadow still dominates most kits, and with reason. It builds from a sheer wash to opaque coverage, blends without dragging, and rewards a fluffy brush tapped free of excess before it hits the lid. Tap the brush every time; fallout is the beginner’s giveaway, and the fix costs nothing.
Cream runs wetter and more pigment-packed, which means bolder color in fewer layers and a finish that favors dry lids. It does crease, though, so you will want primer underneath and a fingertip or flat brush to press it from the center of the lid outward. The Maybelline format notes another path: creamy powders that swipe on with a brush and split the difference between the two textures.
Stick formulas like Color Tattoo Eye Stix skip the brush entirely. Swipe, blend with a finger, and you have color, liner, or primer in one tube. Travel and speed are where this format wins outright.
| Feature | Powder | Cream | Stick |
|---|---|---|---|
| Best tool | Fluffy brush | Finger or flat brush | Stick itself; finger to blend |
| Buildable coverage | Yes | Yes; also layers under powder | Yes |
| Crease risk | Low | Higher; needs primer | n/a |
| Dry-lid friendly | Neutral | Yes | n/a |
| No-brush option | No | Possible | Yes |
Buy powder first if you want to practice blending on a forgiving surface. Buy stick if you want out the door in ninety seconds and tend to forget half your kit.
Choose Colors That Work for You

Choosing an eyeshadow color starts with what you already have: your skin tone and your eye color. Fair skin and light eyes tend to read cleaner with softer, more neutral shades, while deeper skin and darker eyes like brown can carry bolder color without the same risk of looking washed out. Green, gold, purple, and gray make brown eyes pop; red, yellow, orange, and purple do the same for blue. Green eyes respond well to red, yellow, purple, and gray.
The occasion matters too. Everyday wear calls for something quieter; special events let you go heavier. If you are unsure, a neutral palette with light, medium, and dark shades is the safest starting point for beginners. Beiges, creams, and browns work on nearly everyone and build the foundation for almost any look.
Yes, you can absolutely use just one color. Sweep a single neutral across the lid with a fluffy brush and you have a finished look. A shade close to your skin tone reads natural; a light shimmer adds brightness; a darker tone shifts toward smoky. One color is not a shortcut or a compromise. It is a valid choice, and for a beginner it removes half the variables that lead to muddy blending or harsh lines.
Mistakes Beginners Make

Skipping primer is the mistake that shows up first and costs you the most. Within a few hours, the color creases and fades, and the work you put in that morning is gone. A thin layer of eye cream followed by primer on both lids fixes this without adding real time to the routine.
Going in heavy-handed with shadow does the opposite of what you want. Too much product at once leaves patchy color and fallout under the eyes, so you end up cleaning up instead of building up. Thin layers let you control the depth; you can always add more, but brushing excess off after the fact rarely saves the shape.
Not blending enough leaves harsh lines that read unfinished, while over-blending pushes all the colors into one muddy wash. The fix is a clean, fluffy brush and an extra minute spent softening the edge where one shade meets another. You want to see the transition, not the seam.
Frequently Asked Questions
How do you blend eyeshadow?
Use a clean, fluffy brush with no product on it, working only where two colors meet. Keep the pressure light and use small arcs or tiny circles; press too hard and you wipe shadow off instead of softening it. If an edge still refuses to soften, load your clean brush with translucent powder or a matte skin-tone shadow and buff along the brow bone.
What are common eyeshadow mistakes?
Skipping primer is the costliest error, because unprimed lids let shadow crease and fade within hours. Going in heavy-handed leaves patchy color and fallout, while not blending enough leaves harsh lines that read unfinished. Over-blending pushes colors into one muddy wash, and using a brush that is too large for your eye area makes precise application nearly impossible.
How do you choose an eyeshadow color?
Start with your skin tone and eye color. Fair skin and light eyes read cleaner with softer neutrals; deeper skin and darker eyes carry bolder color without washing out. Green, gold, purple, and gray make brown eyes pop; red, yellow, orange, and purple do the same for blue. When in doubt, a neutral palette with light, medium, and dark shades is the safest starting point.
How do you know what brush goes with what?
Match the brush head to the shape of the eye area you are coloring. A fluffy domed brush covers the entire lid and softens borders; a flat shader lays color onto the lid with even pressure; an angled brush reaches the outer corner and lower lash line; a small tapered blending brush works color into the crease; a pencil brush places shadow in tight, specific spots. The wrong brush for the step deposits too much pigment or wastes product.
Can you use just one color for eyeshadow?
Yes. Sweep a single neutral across the lid with a fluffy brush and you have a finished look. A shade close to your skin tone reads natural, a light shimmer adds brightness, and a darker tone shifts toward smoky. One color removes half the variables that lead to muddy blending or harsh lines, so it is not a compromise but a valid choice that still looks polished.